 Bull Flag Trading Strategy: Continuation Pattern Mastery
Flagpole Strength • Tight Coil Consolidation • Measured Move Targets
Few patterns are as powerful—or as misunderstood—as the bull flag. When traded correctly, a bull flag lets you piggyback on strong momentum with defined risk and a logical profit target based on the measured move.
In this guide, we’ll break down bull flags into three core pieces: flagpole strength, tight coil consolidation, and the measured move. When all three line up, you’re no longer guessing—you’re executing a continuation pattern with structure behind it.
1. What Is a Bull Flag (Really)?
A bull flag is a bullish continuation pattern. It forms after a strong, impulsive move up (the flagpole), followed by a controlled, downward or sideways consolidation (the flag), and then a breakout in the direction of the original move.
A textbook bull flag has:
- A sharp, clean impulse move (flagpole) with strong volume.
- A tight, shallow consolidation that drifts sideways or slightly down.
- A breakout through the flag’s upper trendline, ideally with renewed volume.
2. Flagpole Strength: Why the First Move Matters
The quality of the flagpole sets the tone for the entire setup. Weak pole = weak flag.
Look for these traits in a strong flagpole:
- Clean directional move: Multiple consecutive green candles with minimal overlap.
- Above-average volume: Volume expanding as price moves up, not shrinking.
- Breaking key levels: The move clears prior resistance, premarket highs, or daily levels.
- Minimal wicks: Strong closes near the highs of the candles show conviction.
If the flagpole looks choppy, full of indecision wicks, or driven by thin volume, the “bull flag” you’re seeing might just be random noise.
3. Tight Coil: The Flag That Tells You Smart Money Is Holding
After the impulsive leg, price needs to cool off. The best bull flags form a tight coil—a narrow consolidation that drifts sideways or slightly down, without dramatic selling.
A high-quality bull flag “coil” usually:
- Pulls back shallowly (e.g., 20–40% of the flagpole, not the entire move).
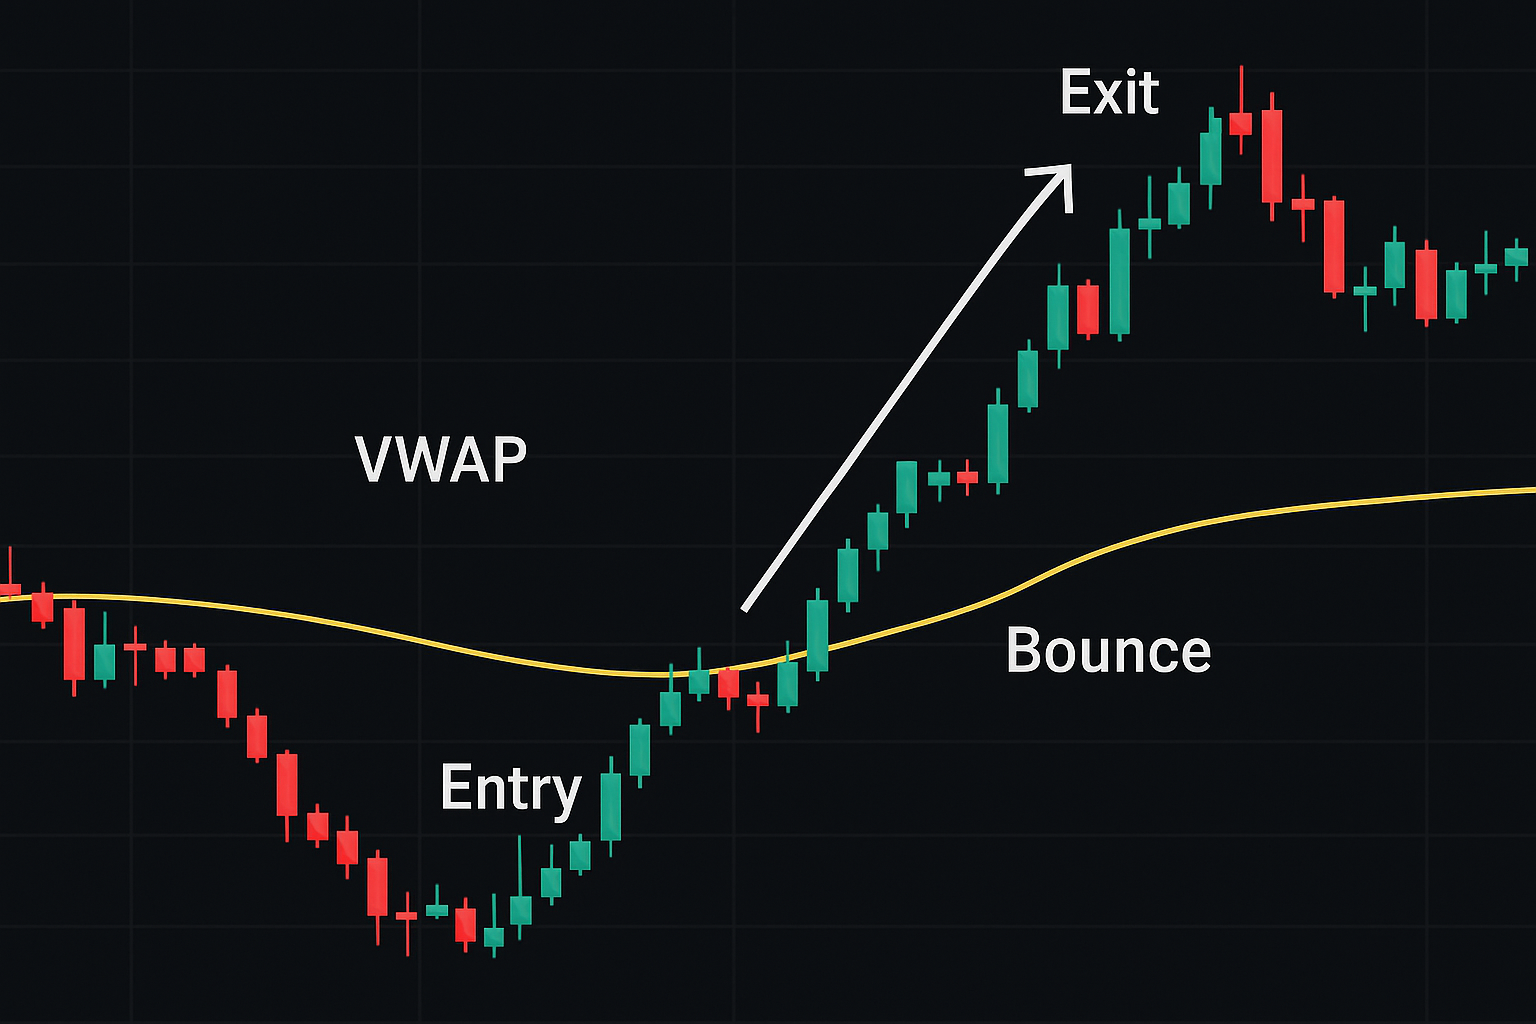
- Stays above key support (e.g., VWAP, broken resistance, prior high).
- Forms tight candles with shrinking range and lower volume.
- Creates parallel trendlines forming a channel or wedge that points slightly down.
The message behind a tight coil is simple: dip buyers are active, sellers are not aggressive, and big players are likely holding, not dumping.
4. The Measured Move: How to Set Smart Targets
The beauty of a bull flag is that it comes with a built-in targeting method: the measured move.
Here’s how to calculate it:
- Measure the height of the flagpole from the base of the impulsive move to the top before consolidation starts.
- Once price breaks out of the flag’s upper trendline, project that same distance upward from the breakout point.
- That projected level becomes your measured move target—a realistic expectation for where the next leg could end.
You don’t have to hit the measured move to call the trade a win. But it gives you an objective framework instead of arbitrary hope-based targets.
5. The 7-Step Bull Flag Trading Process
Let’s turn this into a practical, repeatable process you can use each day.
Step 1: Scan for Strong Morning Movers
Focus on tickers with:
- High relative volume.
- Clean trend on the 1-min/5-min chart.
- Fresh catalysts (earnings, news, sector momentum).
Step 2: Confirm the Flagpole
Identify a clear, impulsive leg up with strong volume. Mark the base and top of this move.
Step 3: Mark the Flag Structure
Draw trendlines around the consolidation:
- Upper trendline: connects the highs of the pullback.
- Lower trendline: connects the lows, forming a channel or small wedge.
Make sure the flag is relatively tight and shallow compared to the pole.
Step 4: Watch Volume During the Flag
Ideal behavior:
- Volume contracts during the flag.
- No giant red volume bars suggesting heavy distribution.
- Volume starts to tick up again as price tests the upper trendline.
Step 5: Enter on Breakout of the Flag
Your entry trigger is usually:
- Break of the upper trendline of the flag, or
- Break of the flag high (the first high after the pole).
Avoid anticipating the breakout too early unless you have a clear edge in reading micro price action.
Step 6: Place a Logical Stop
Common stop locations include:
- Below the lower flag trendline.
- Below the last higher low inside the flag.
- Below a key level like VWAP or prior breakout level (for slightly wider swings).
Size your position so that the distance between entry and stop equals 1R in your risk plan.
Step 7: Manage Targets with the Measured Move
Use a tiered profit-taking approach:
- First partial at 1–1.5R.
- Second partial near the measured move.
- Trail a stop on the rest in case the trend extends further.
6. Common Bull Flag Mistakes That Kill Your Edge
Bull flags are powerful, but only if you avoid the most common traps:
- Chasing extended flags: If the flag drags on for too long or retraces too deeply, the continuation edge weakens.
- Ignoring the bigger timeframe: A beautiful 1-min bull flag inside a major daily resistance zone can fail hard.
- Buying “flags” with no real pole: Random chop is not a bull flag, even if TradingView Twitter says so.
- Oversizing because it’s a “high-probability pattern”: No pattern is guaranteed. Risk should stay constant per trade.
- Refusing to exit failed flags: Once the lower flag structure breaks with volume, the idea is invalid. Cut it.
7. A Simple Bull Flag Checklist for Your Journal
To make bull flags a serious part of your system, turn them into a checklist you can grade in your journal:
- Flagpole strength: Clean impulse? Strong volume? (Score 1–5)
- Flag depth: Pullback shallow (20–40%) or deep / sloppy? (Score 1–5)
- Flag tightness: Tight, controlled coil vs. wide, violent swings? (Score 1–5)
- Volume pattern: Expanding on pole, contracting in flag, rising on breakout? (Score 1–5)
- Location: Breaking into clear space or directly into resistance? (Score 1–5)
- Execution: Did you follow your entry, stop, and target rules? (Yes/No)
Final Thoughts: Ride the Trend, Don’t Fight It
Bull flags are one of the cleanest ways to trade with the trend instead of against it. By focusing on flagpole strength, tight coil consolidation, and measured move targets, you turn a common pattern into a structured, rule-based strategy.
You don’t need to catch the bottom or top of every move. You just need to consistently participate in the middle of strong trends with defined risk. That’s exactly what a well-traded bull flag allows you to do.
Build your own bull flag playbook, track it, refine it—and make this pattern one of the core weapons in your trading arsenal.
📘 Day Trading for a Living — Full Bull Flag Playbook Inside
In Day Trading for a Living, I walk through bull flags, VWAP bounces, and price action setups in a complete trading plan—from scanning and entries to risk management and journaling. If you want bull flags to be more than “just a pattern,” this book ties everything together.